
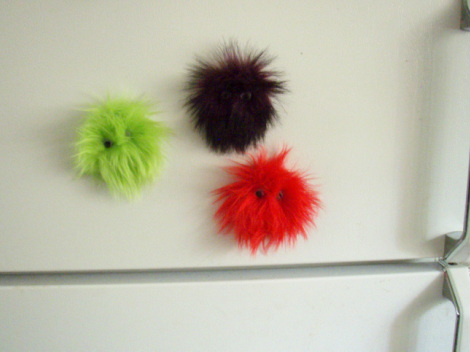
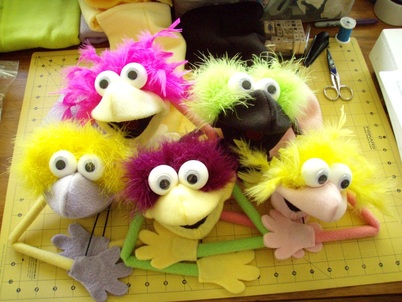
These fun fridge magnets are super simple and cost next to nothing to create. You’ve probably got most of the supplies on hand already. This is a great project for kids too (just make sure an adult is in charge of the hot glue gun). You can use these little guys to liven up your fridge, give away as party favors for a monster themed birthday party, give as Christmas or birthday gifts, use as a locker buddy, or just make someone smile. After all, everyone needs a cute little monster magnet, right?
Here are the supplies you will need:
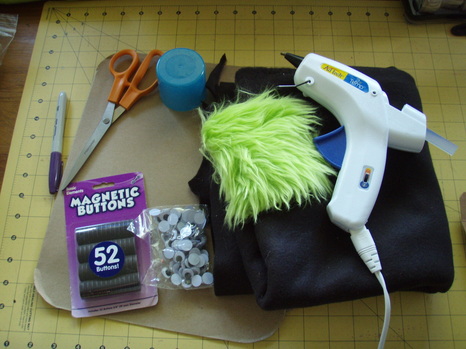
- Scrap piece of cardboard. Make sure it’s big enough to make the desired size of monster in one piece. You can use an old shoe box, cereal box, or whatever you can find in the recycle bin. My cardboard came from a frozen lasagna dinner :)
- Circle to trace. I used the lid of a cooking spray can. It’s about 2 ¼” in diameter. It doesn’t matter what size it is as long as you’ve got enough material to cover it plus ¼”.
- Pen or marker to trace your circle.
- One or two pairs of scissors. You will be cutting cardboard as well as fabric, so you may want to use two different pairs. Please don’t use your best fabric scissors for cutting cardboard!
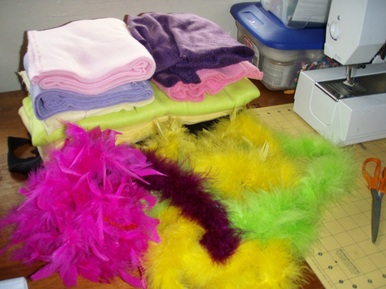
- Black fleece or felt for the back of your monster. Really anything will work here and it doesn’t even need to be black. Just try to avoid using anything too thin as the hot glue will seep through and it won’t look quite as nice.
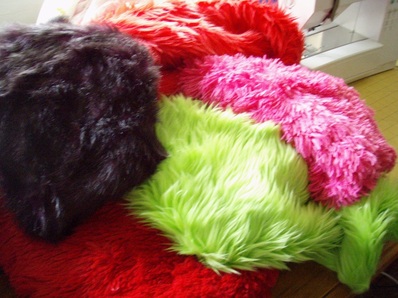
- Fun scrap of fabric for the front of your monster. I used long shaggy fur for this tutorial, but anything will work. It’s up to you! Again, I recommend you avoid using thin fabrics like cotton prints, quilting fabrics, flannel, etc. The thicker, the better.
- Googly eyes. These can be found at any craft store in a variety of sizes. I used 12 mm.
- Craft magnets. You can also find these at craft stores in a couple of different sizes. You don’t need the super strong ones unless you’re planning on having your monster hold a ton of papers to the fridge. I just used regular strength 19 mm or ¾” magnets. I found mine at Walmart in a pack of 52 for a little under $6.
- Hot glue gun and hot glue. Other glues would probably work, but I prefer hot glue. It works well on all of the surfaces we’ll be working with and it dries super fast. Just be careful not to burn yourself.
Now that you’ve got your supplies, plug in that glue gun and let’s get started!
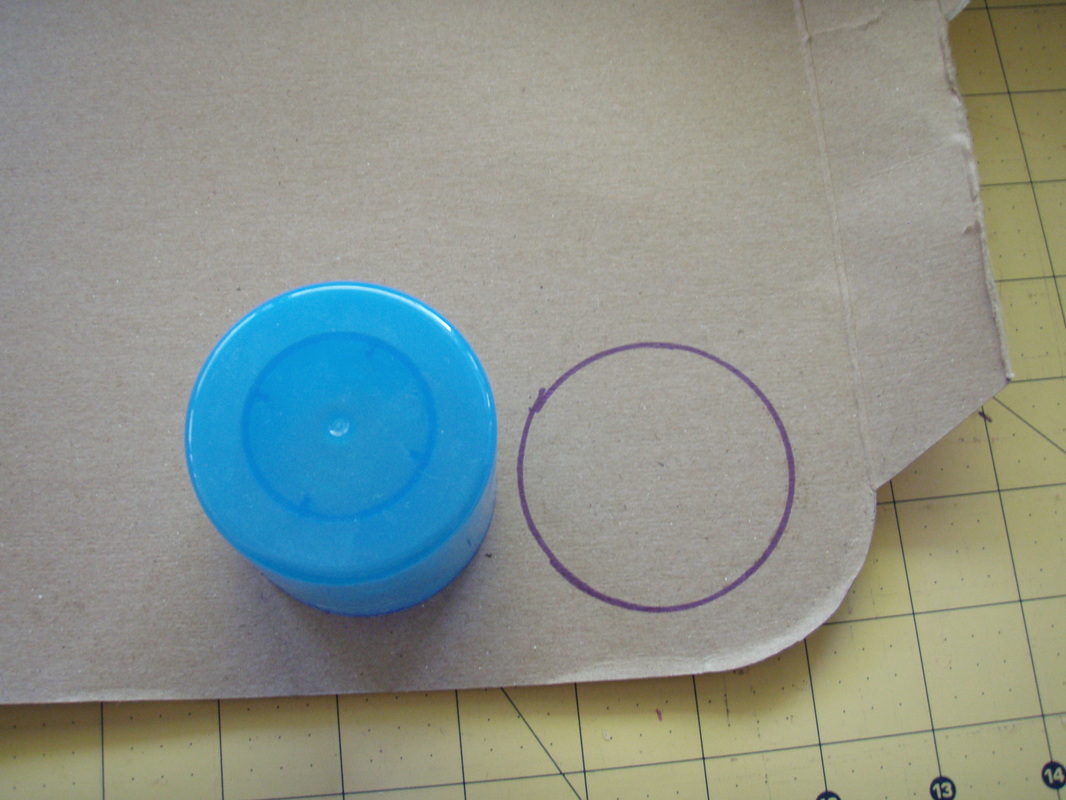
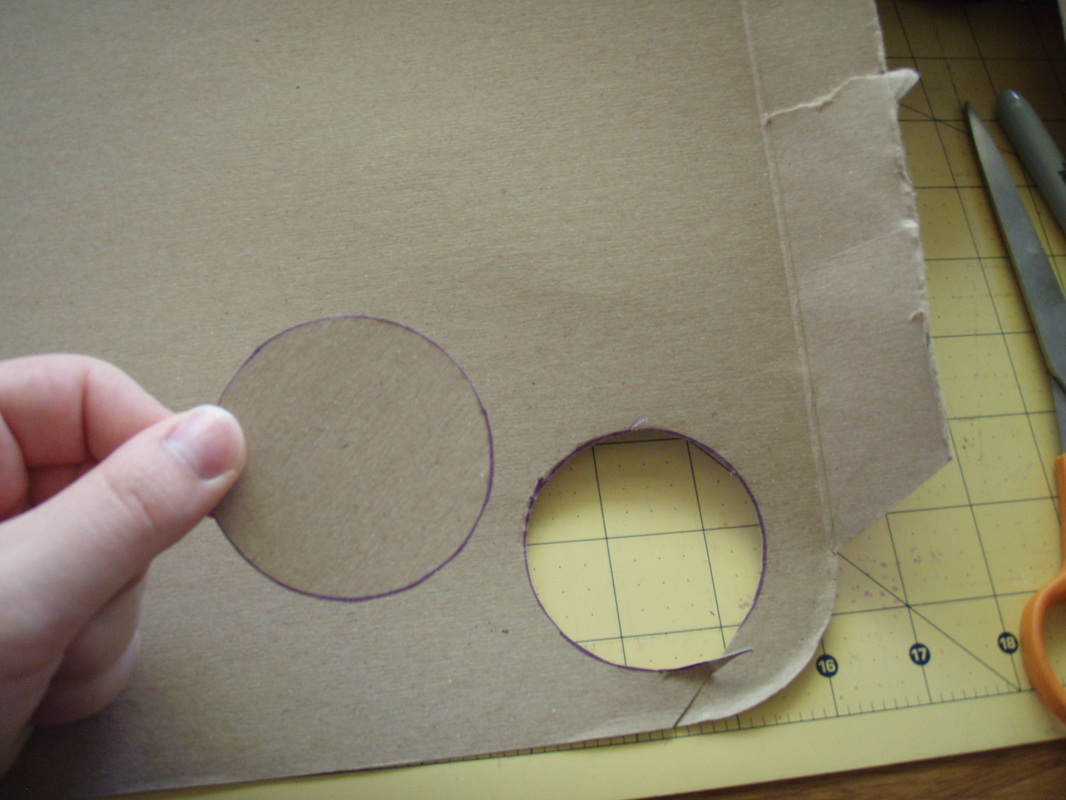
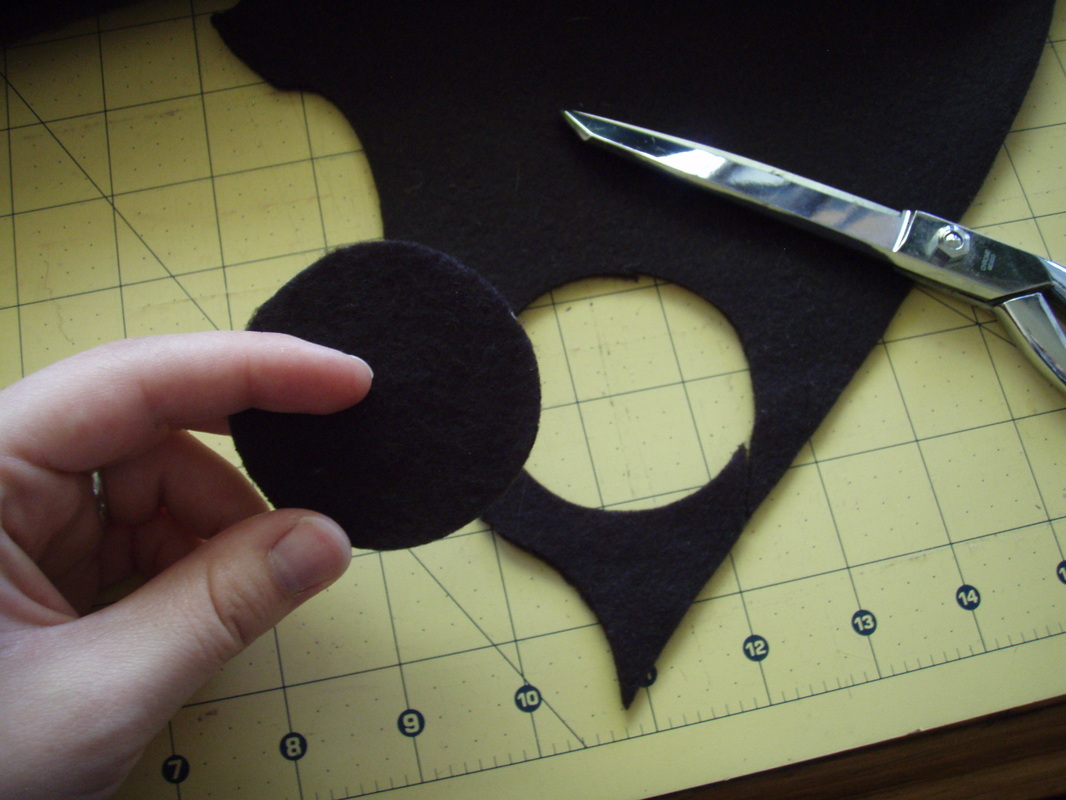
- Trace your circle onto the cardboard and cut it out. Don’t stress about perfection here. It just needs to be round. I suppose it could be any shape you want really—square, triangle, hexagon. Ooh, I see a lot of possibilities for different monster shapes now… moving on.
 |  |
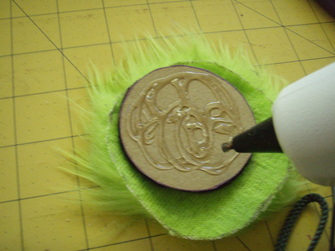
2. Glue the cardboard circle to your black fleece (or whatever you’re using as the backing fabric) and cut
around the cardboard circle close to the edges. You don’t need to leave any spare fabric around the outside.
around the cardboard circle close to the edges. You don’t need to leave any spare fabric around the outside.
 |  |
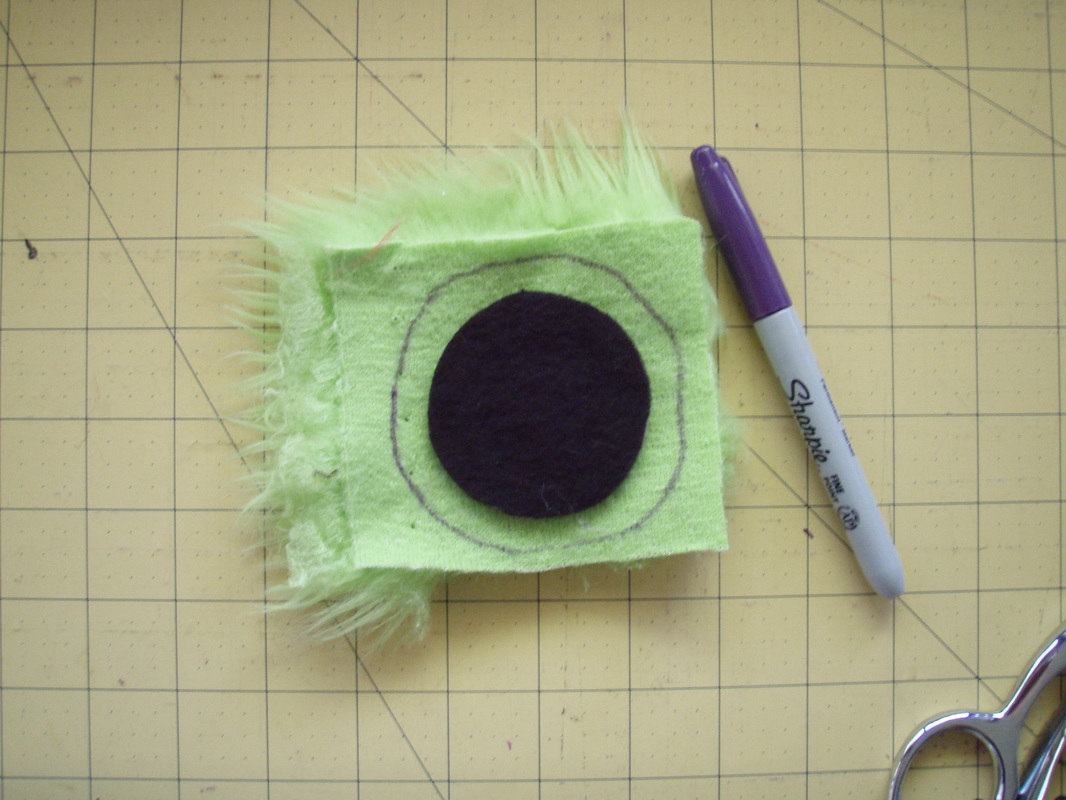
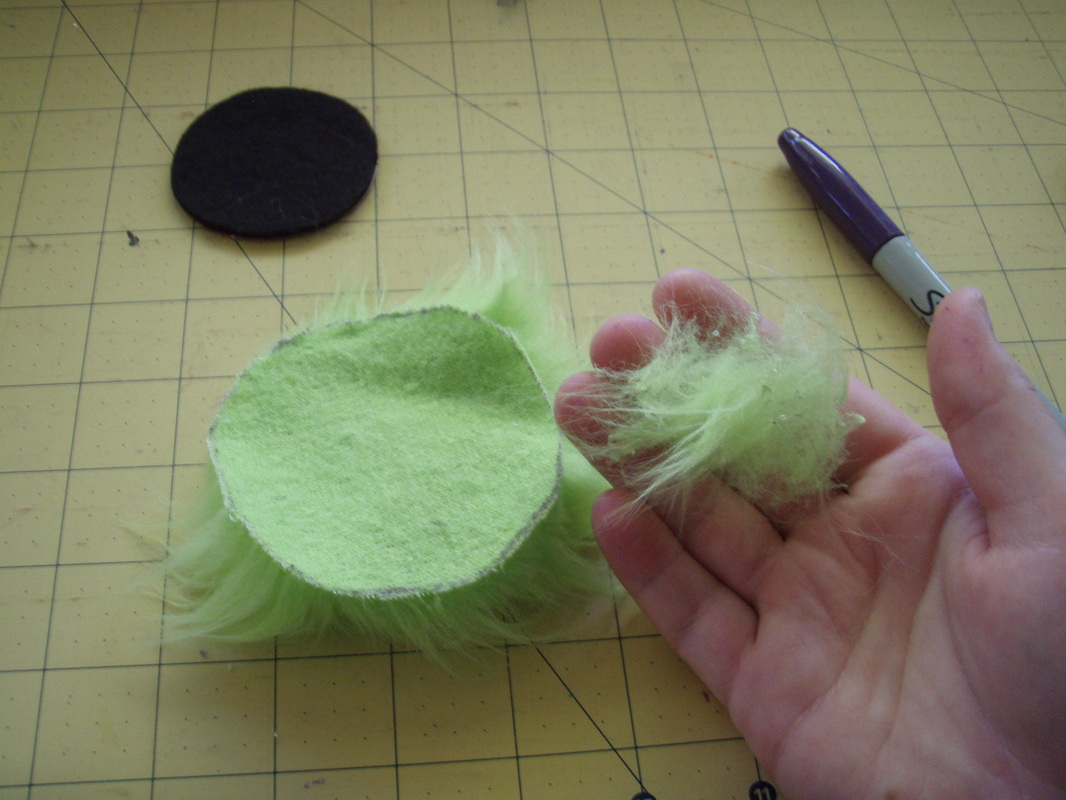
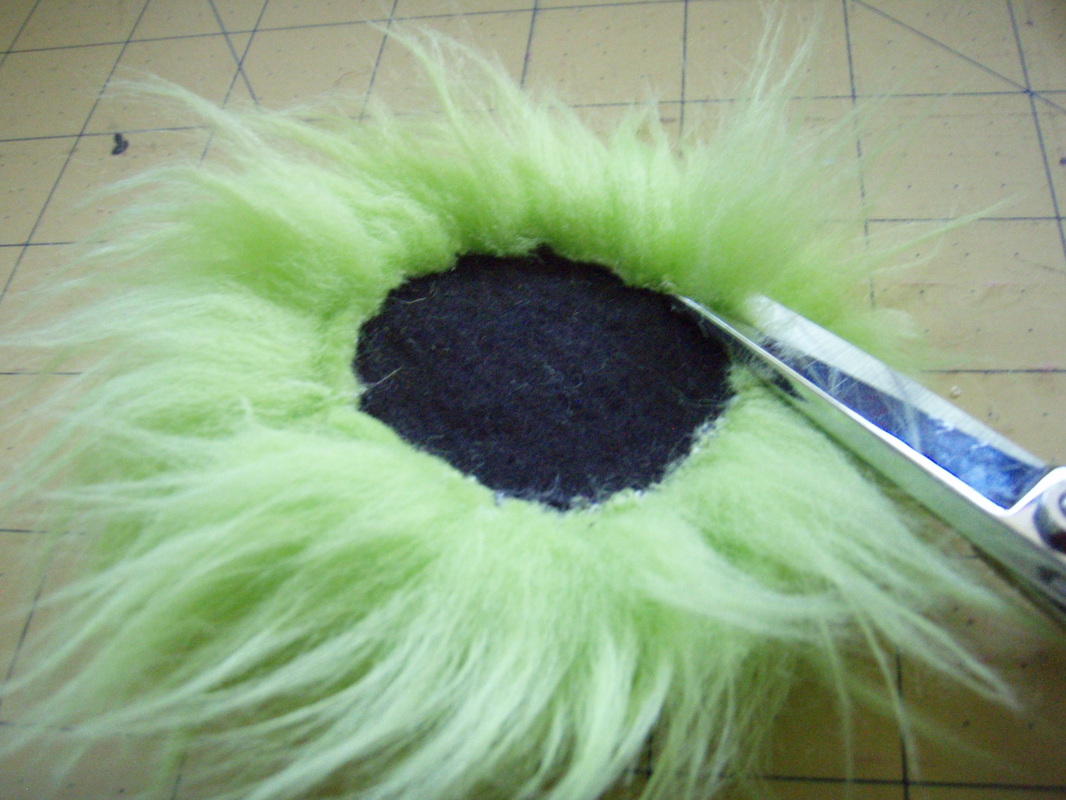
3. Lay your circle onto the back of the fur and trace around it ¼”. Cut out your fur circle. Here’s a tip for
cutting fur: always cut from the back and only cut the fabric the fur is connected to--not the fur itself. This
will take a little longer than chomping through the whole thing (fabric and fur), but you’ll be glad you took
the time. If you cut through the fur itself, it will be super messy and look choppy and uneven on the front.
Once you’ve cut out your fur circle, flip it over and gently pull any loose fur away.
 |  |
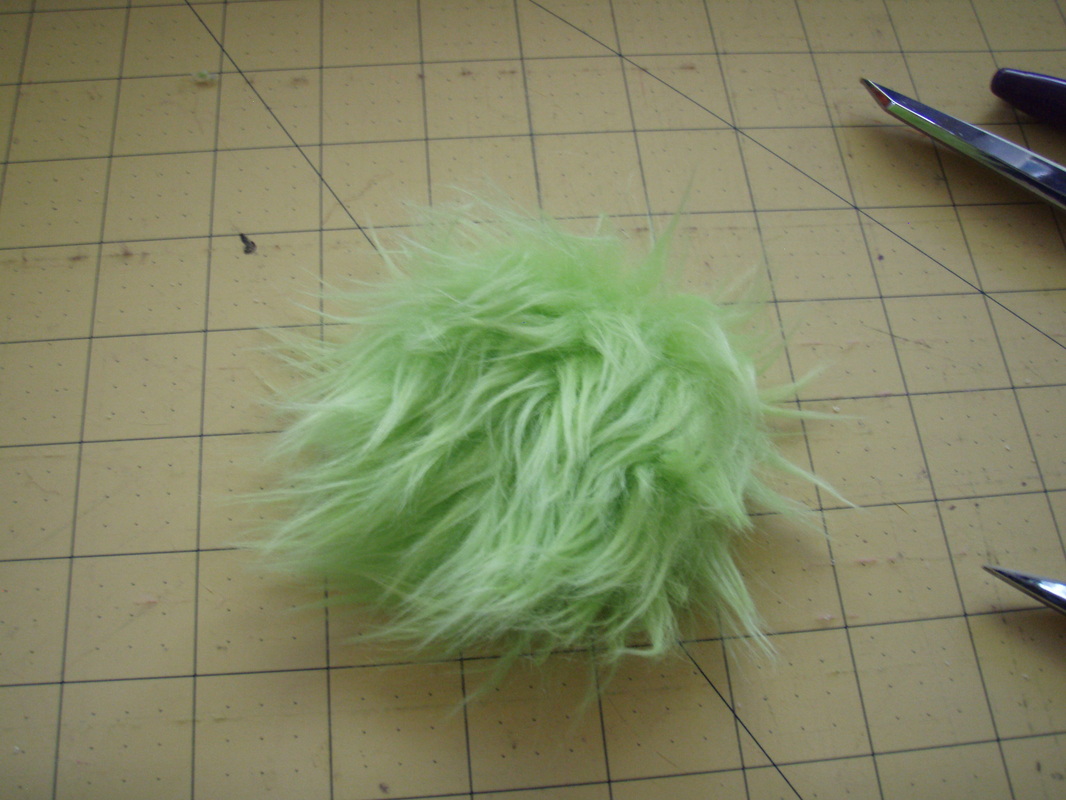
4. Flip it back over and glue the uncovered side of your cardboard circle to the center of the fur.
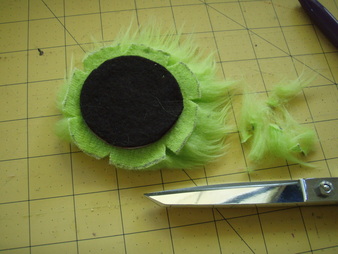
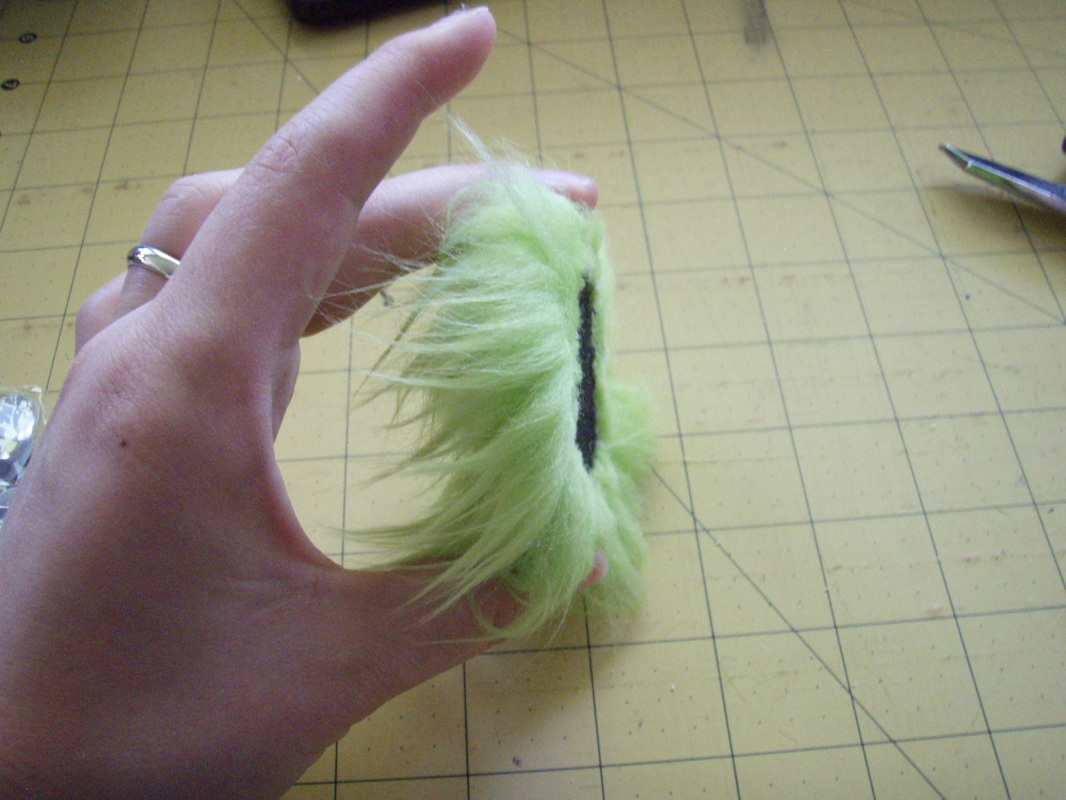
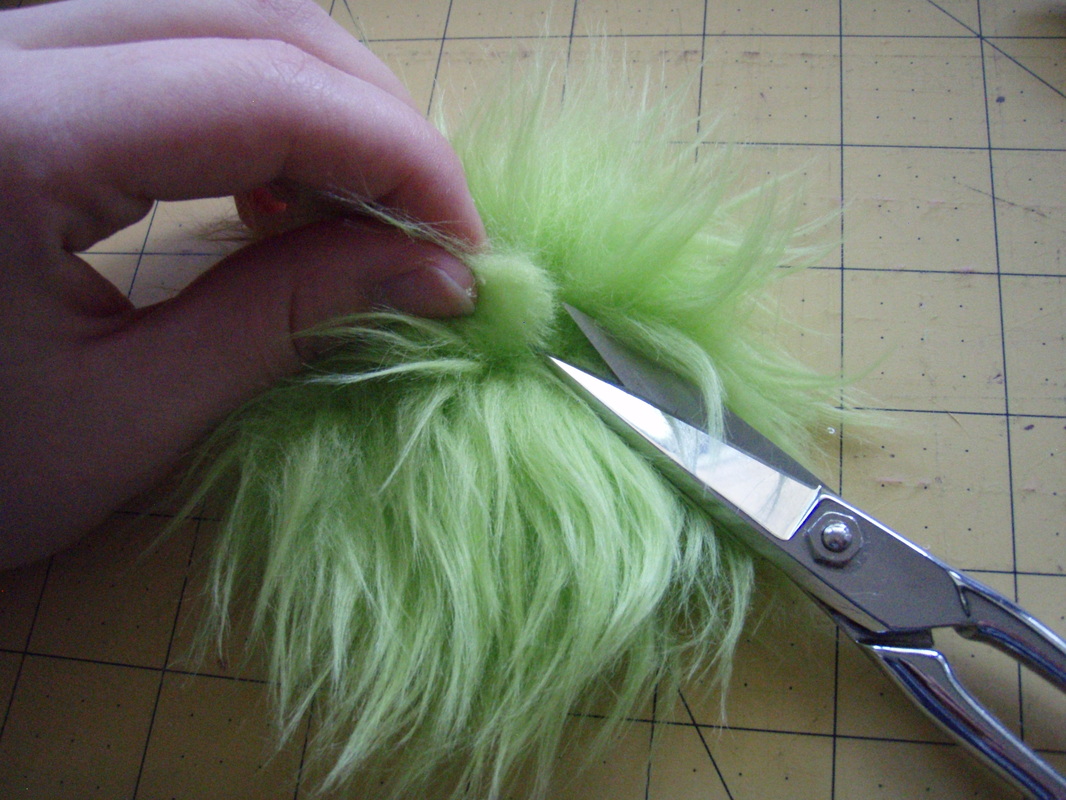
5. Clip small triangles all around the fur circle about 1” apart.
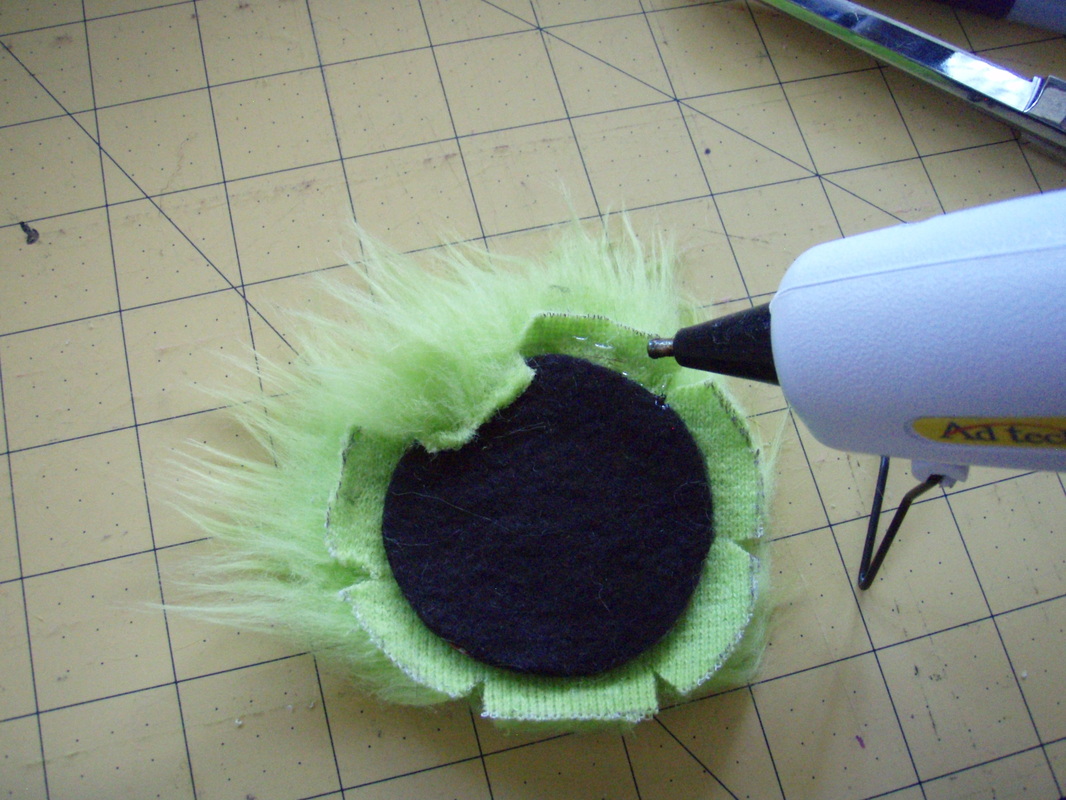
6. Glue down the edges of the fur one section at a time working your way around the circle. You only need to
put down a small line of glue at a time. If you use too much, the extra will be pushed out and onto your
finger. Ouch!
put down a small line of glue at a time. If you use too much, the extra will be pushed out and onto your
finger. Ouch!
 | 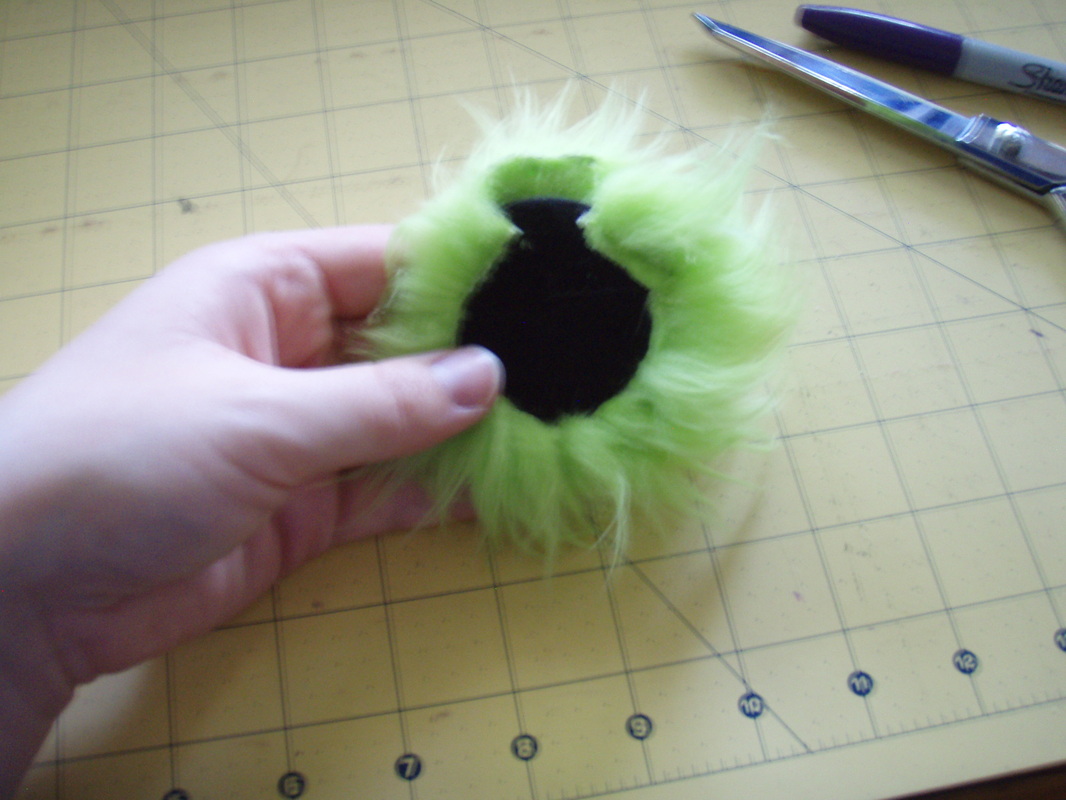 |
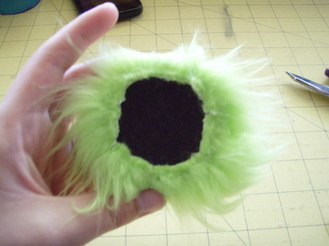
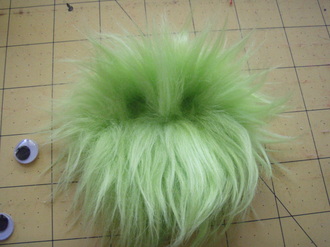
7. Using the tip of your scissors, trim the fur that has been wrapped around the back down to the fabric so the
back of your monster is nice and flat. This will keep fur out of the way of the magnet. If you like things neat
and tidy like me, go ahead and trim off any excess glue or weird edges here as well.
back of your monster is nice and flat. This will keep fur out of the way of the magnet. If you like things neat
and tidy like me, go ahead and trim off any excess glue or weird edges here as well.
 |  |
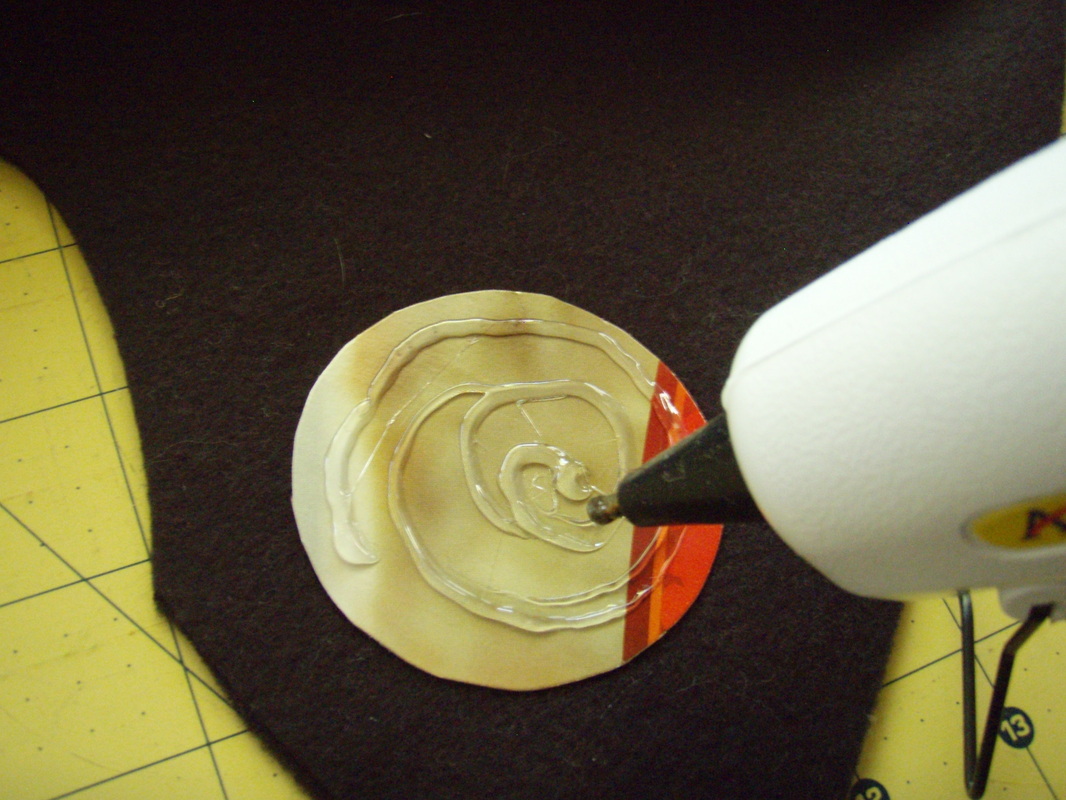
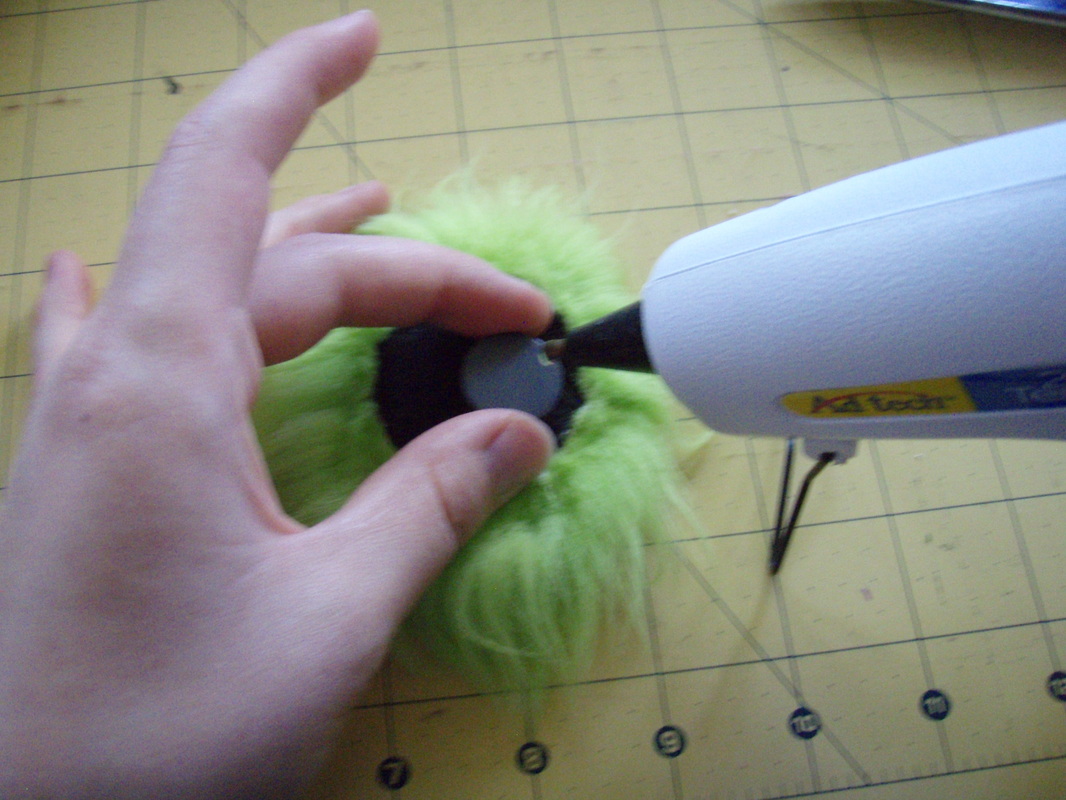
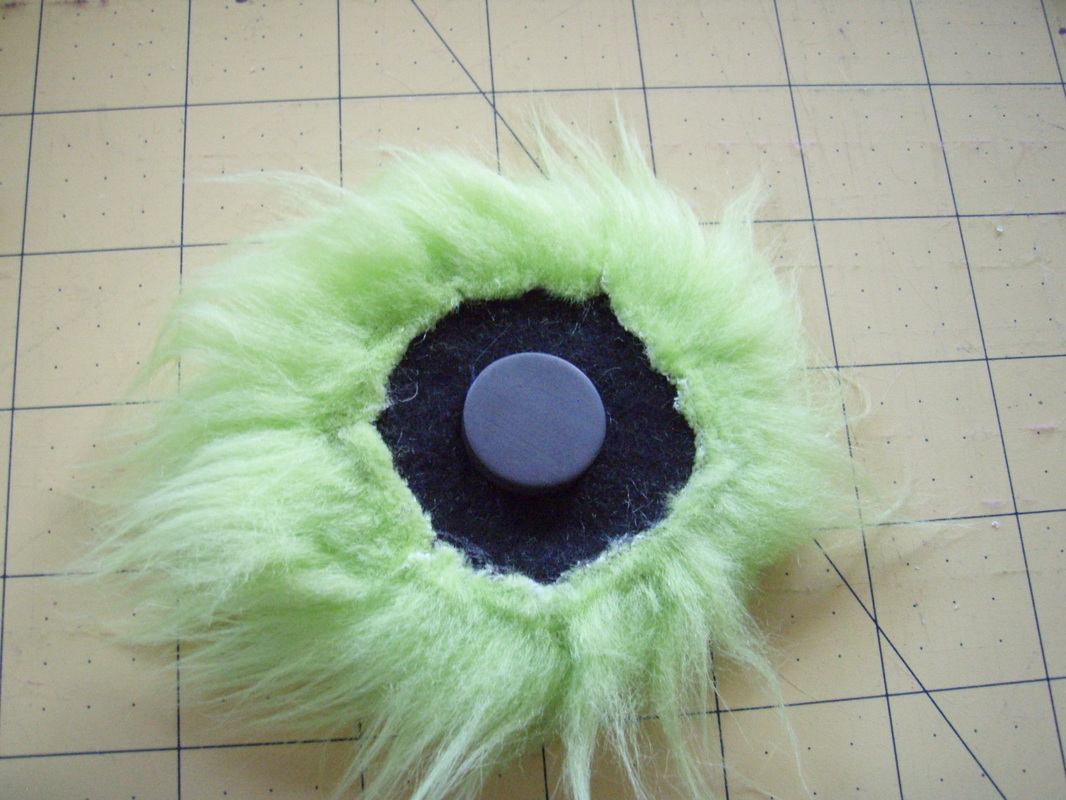
8. Now for the magnet. Easy peasy—glue it to the center of your circle.
 |  |
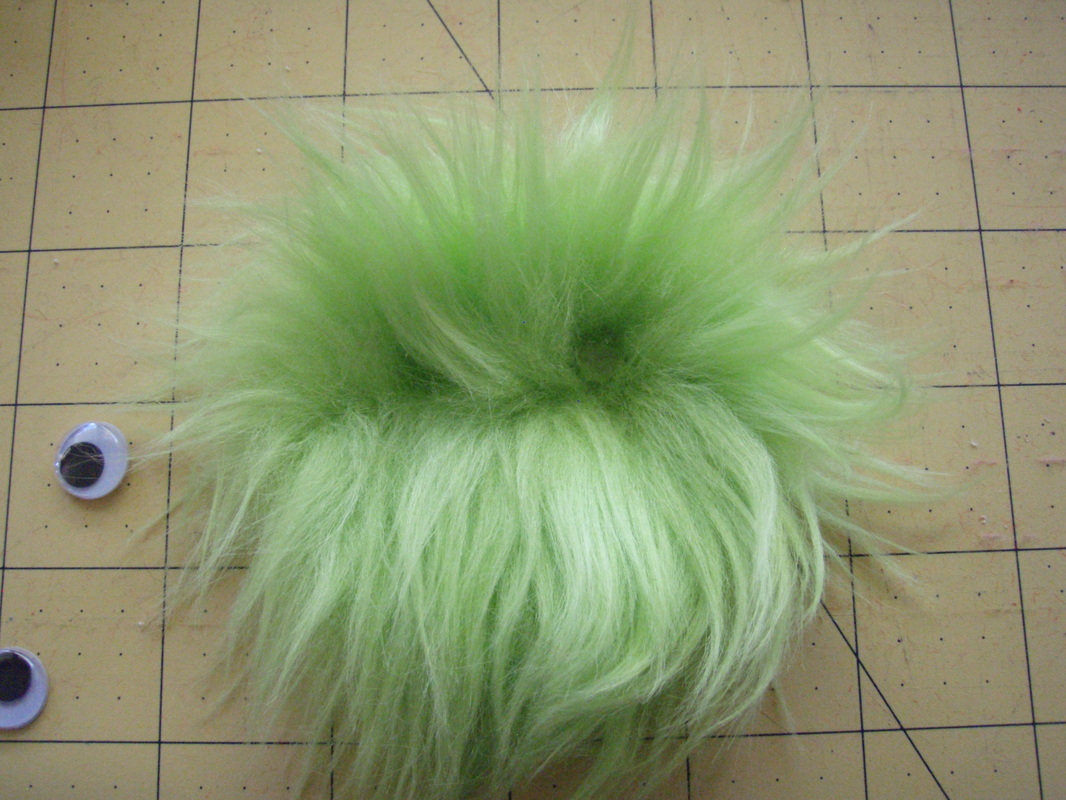
9. Flip it over and figure out where you want the eyes to go. Once you’ve found a good placement, trim the
patches of fur where the eyes will sit down to the fabric so the eyes have a nice solid place to stick.
patches of fur where the eyes will sit down to the fabric so the eyes have a nice solid place to stick.
 |  |
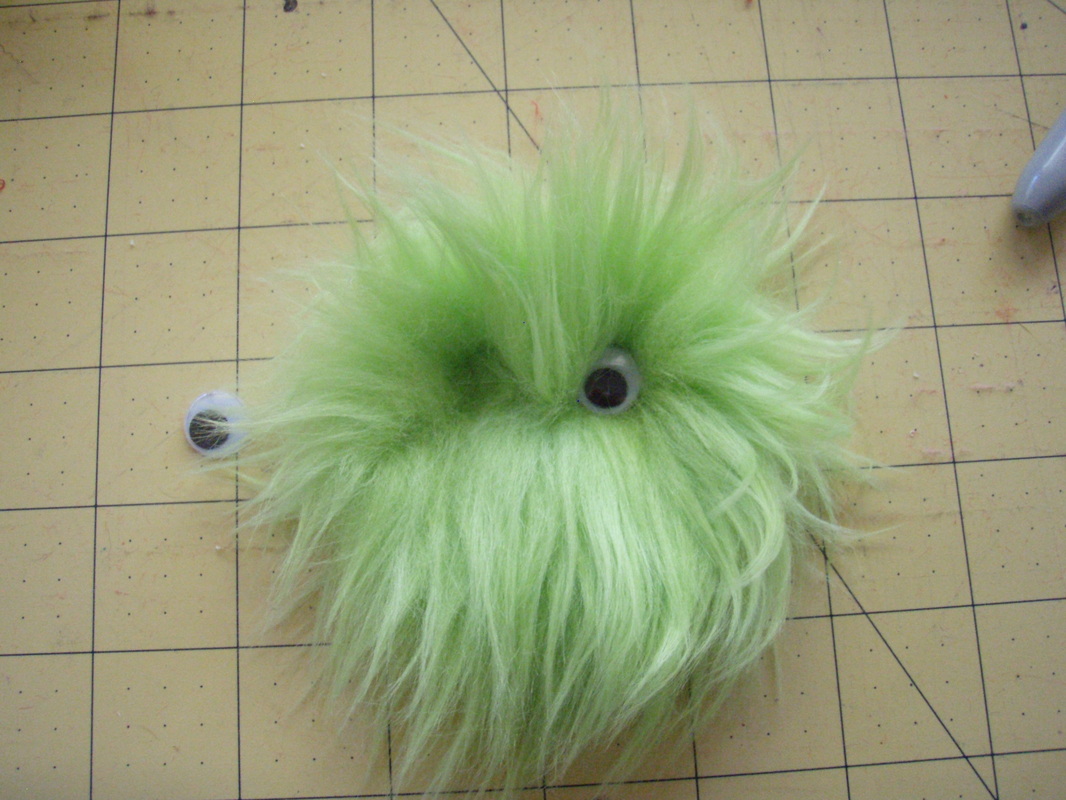
10. Glue the eyes into the eye sockets. A small bead of glue will work just fine. If any excess glue seeps out
from under the eyes, wait for it to cool and trim it out as best you can with the tip of your scissors. Luckily,
fur will hide any sort of mishap like that quite nicely.
from under the eyes, wait for it to cool and trim it out as best you can with the tip of your scissors. Luckily,
fur will hide any sort of mishap like that quite nicely.
 |  |
And you are done!
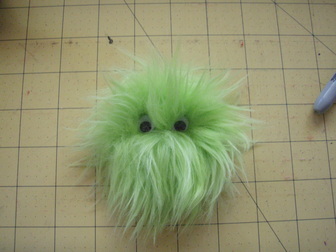
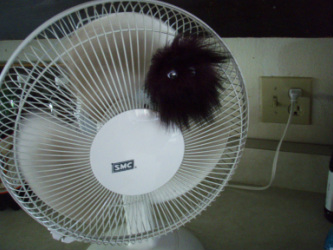
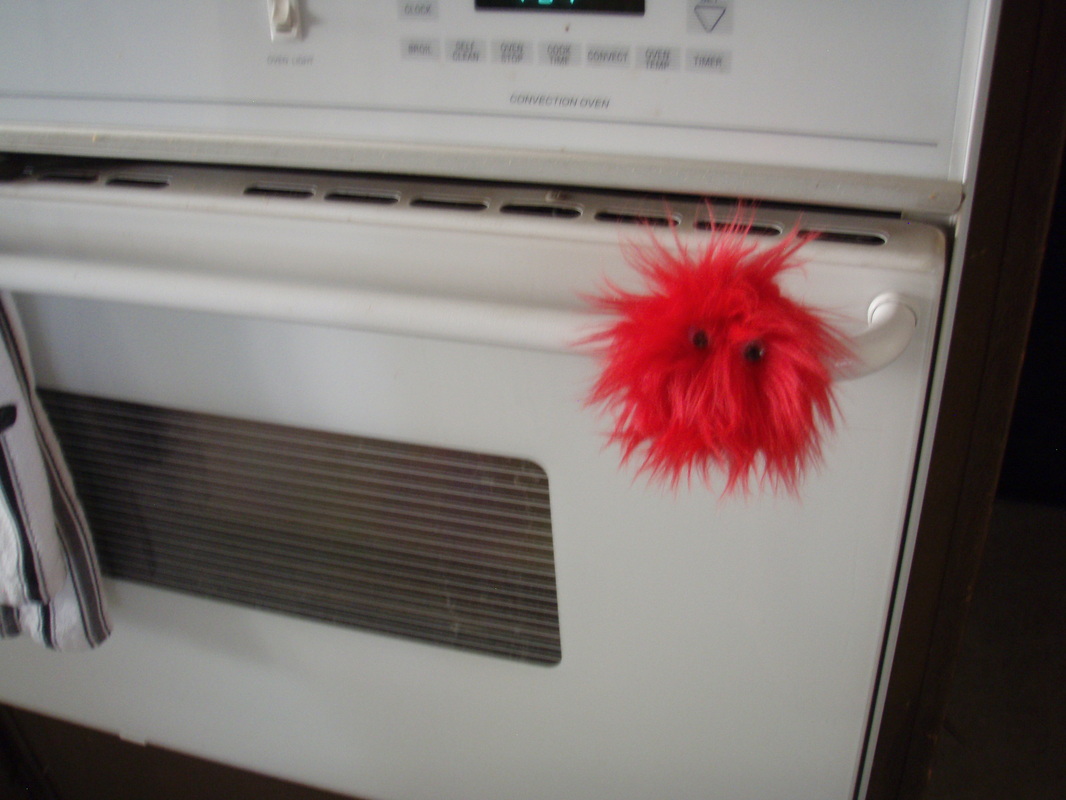
Now you can go make lots of friends for your new little monster magnet!
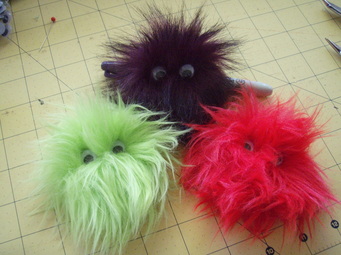
Or go monster bombing around the house...
 |  |
If you have any questions about this tutorial, please feel free to ask. I'll do my best to clear up anything that may be confusing. Also, please respect my rights as the creator of these monsters and do not sell the finished product or reproduce this tutorial or any of the pictures as your own. If you want to share this on your blog, let me know! Thanks!
-Sarah
-Sarah


 RSS Feed
